-
You'll
need a sequencing application to turn your stills into
a movie. We used a shareware application called Graphic
Converter, which you can download
for Mac or PC.
-
Open
the program, and choose "Convert" from the File
menu.
-
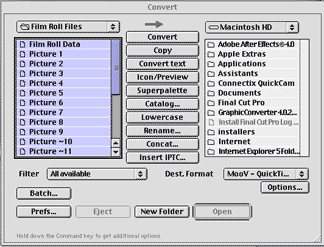
In
the dialog box that appears, select all the files that
you wish to convert to a movie. In Graphic Converter,
the files are shown on the left side of the screen. We
navigated to the "Film Roll" folder, then opened
it and chose "select all" from the Edit menu
to select all our pictures.

Convert
Window with All Files in Film Roll Selected

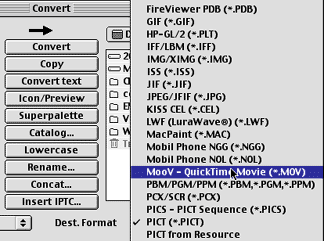
Destination
Format Menu

Choosing
MooV as the Destination Format
-
Click
the Convert button in the center of the window, at the
top.
-
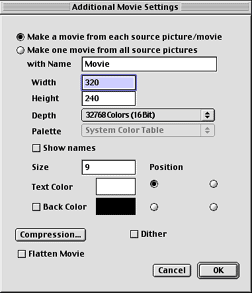
In
the Additional Movie Settings pop-up window, name the
movie, and change the size or color depth of the movie,
if you wish.

Additional
Movie Settings Pop-Up Window
-
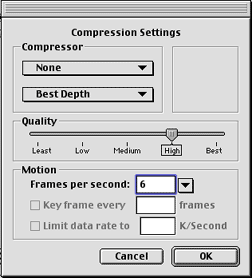
Click
the Compression button to set your compression. It's a
good idea to make a master movie with the compression
set to "None". You may want to make additional
movies compressed for the web or CD-ROM, using Sorensen,
or another type of compression.
-
You
can also set the frame rate in the Compression Settings
Window. Six frames per second should be fine, but you
can always up the frame rate later if the movie looks
too choppy.

- After
you've taken all the pictures, quit the picture taking program
and proceed to the next step
|


